How I’ve Upped My Instagram Game + My Photo Editing Secrets
Like many of you probably do as well, I put a lot of thought and energy into my Instagram — actually, a ton. The photos I post, the locations, the angle they’re shot at, the lens I use, the colors, the editing… all of it is carefully considered before I ever press publish (exhausting, right?). Today’s post is an update on how I’ve upped my Instagram game within the last month, the techniques and equipment I use, the presets I invested in, and my photo-editing secrets that help me maintain an exciting and cohesive feed.
To give you some background on my Instagram history, I’ve had the same account for years (@abbysaylor) and evolved my personal account into my blog account once I launched my website two and a half years ago. I haven’t participated in loop giveaways, nor do I follow people for follow-backs and I’ve never dared to buy followers/likes (*gags*), so my growth has been completely organic, and in turn, slow.
I know this rate of growth isn’t accurate for everyone and others bloggers that have consistently been in the game as long as I have may have different results — and I’m not going to lie, that can be super discouraging sometimes. I’m always working on bettering my content and increasing my engagement (all naturally of course), but it does get tough sometimes. With trying to better my content and image quality, these are the latest techniques I’ve fine-tuned for a feed I’m (usually) proud of. 😉
Yes, Adobe Lightroom will really change your life.
I’ve heard people go on and on about how great Lightroom is for photo editing for years, and though I’d made weak attempts at learning how to use it in the past, I always pushed it aside and used my old techniques since that was faster and easier for me. I finally bit the bullet and decided to give it a real go about a month ago and I haven’t looked back since! It’s changed my editing game for the better and I actually really enjoy using it — it’s like a new hobby for me! You do have to purchase a subscription to Adobe Creative Cloud to use the program, but I definitely suggest looking into it.
Shoot in RAW.
A raw file is the image as seen by the camera’s sensor. Think of it like unprocessed film. Rather than letting the camera process the image for you, turning it into a JPEG image, shooting in raw allows you to process the image to your liking.
I made the transition to only taking my photos on my cameras rather than my phone and it’s made all the difference! Though using my phone is way more convenient, shooting high-quality pictures on my nicer cameras gives me so much more to work with, allowing me to turn just about any photo into something post-worthy. Shooting in RAW allows me to create the exact look I’m aiming for without the photo getting too grainy — give it a try!
Presets really are everything.
Again, presets are something I’ve heard about time and time again that I finally decided to give a try. Not wanting to invest in something I wasn’t sure if I’d like, I decided to buy an inexpensive one on Etsy and instantly regretted it because it was TERRIBLE. Like so bad, you guys. I bought one called “Pastel” or something like that and it made all of my images look cloudy and awful. Though I didn’t spend much money on it, I was upset I wasted money on something that was total crap for me. After that wore off a few days later, I decided to give it another go and buy Jaci Marie’s Pastel Pack presets because I knew if anybody’s were going to be good and worth the money, it would be hers — and she didn’t disappoint! These presets are GOLD and have completely changed my editing game. I’ve never felt more confident in my images and I love plugging them into my photos just to see how they turn out. It’s helped bring back my longtime love for photography and I couldn’t be happier with them. 10/10 recommend.
The edits I always make (as needed):
- Increase exposure
- Sharpen the image
- Sometimes add a tiny bit of contrast, but not often
- Bump up clarity a small amount
- Turn up noise reduction and color noise reduction
- Detail out my eyes, hair and clothing
- Turn up temperature
- Increase saturation of key colors in the image
- Increase orange saturation on skin tone
- Decrease lumination on orange tones to darken skin a bit
- Increase lip color saturation if needed
- Decrease lip color lumination if needed to darken lips
- Brighten whites
- Lighten shadows
- Darken blacks
The cameras + lenses I use:
- Canon Rebel t3
- EF 50mm f/1.8 STM lens (fixed lens, creates blurred background)
- EF-S 10–18mm f/4.5–5.6 IS STM lens (wide-angle lens)
- Sony Alpha a5000
- iPhone 7 Plus
My secret weapon lately has been the wide-angle lens.
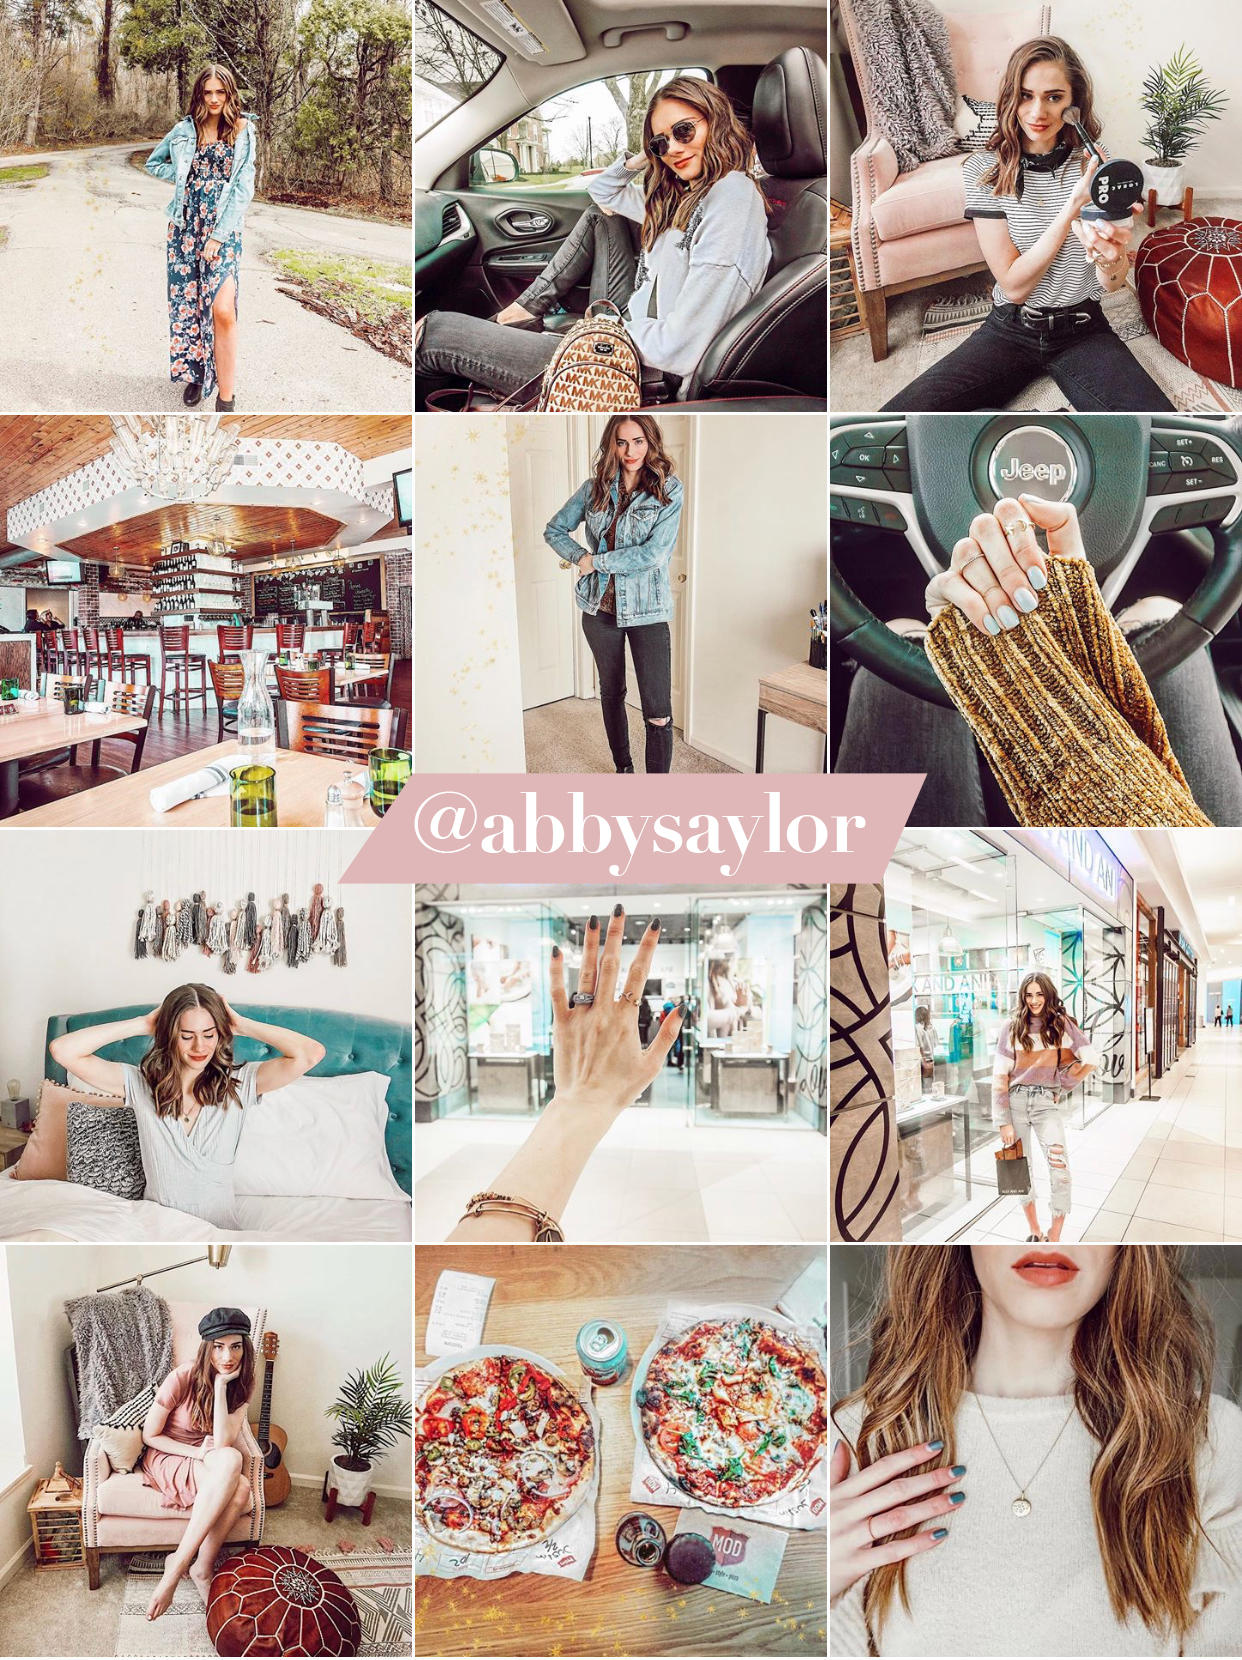
I’ve had this wide-angle lens (listed above) for over a year now and I feel like I’m just now learning how to use it to its fullest capacity. This puppy is ideal for tight spaces, a somewhat distorted angle for creative shots (I’m super into this look right now!), landscapes and times when you want to fit as much in the frame as possible. This has been my go-to lens for all occasions, because if used properly, you’ll always get a great image no matter what the circumstances are. It can be tricky to get the subject in focus sometimes if taken from far away with a lot going on in the background, so just be aware of that and adjust accordingly. This lens has helped me capture images on my Instagram like the in-car ones, the ones from the Alex and Ani event I attended, the Lorac powder photo + more!
__________
That pretty much sums it up! I hope you found this post helpful and can apply these tips to your photography + photo-editing strategies. If you have any Instagram tips, suggestions, advice or questions, feel free to leave them in a comment below. 🙂 Click here to follow my account — thanks for reading!
