Mint Bohemian Kitchen Makeover: Before & After (+ How to Paint Cabinets)

It’s finally here — our kitchen reveal! I’m so excited to share this with you guys & I know you’ve been anxiously waiting for it! If you’ve been following our house journey, you know the kitchen (and flooring) is the biggest project we’ve tackled in our first home. The house came with fresh cabinets, but it was all very standard and the whole space needed some sprucing up. Keep reading for the details on how we transformed our kitchen including before and after photos, tips for painting cabinets, the paint and hardware we used + more!
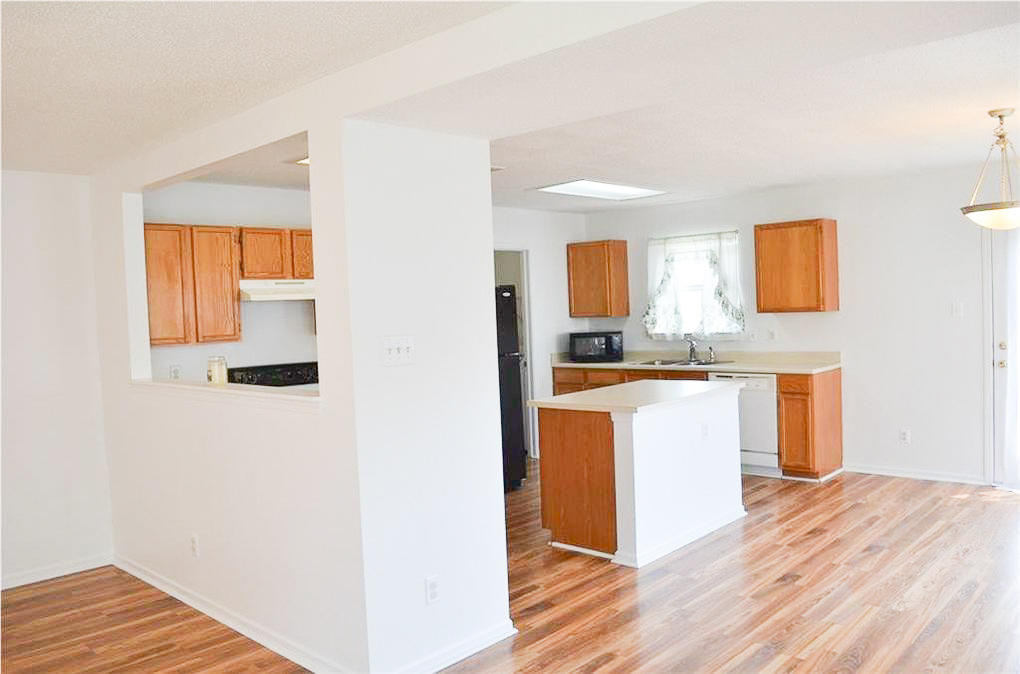
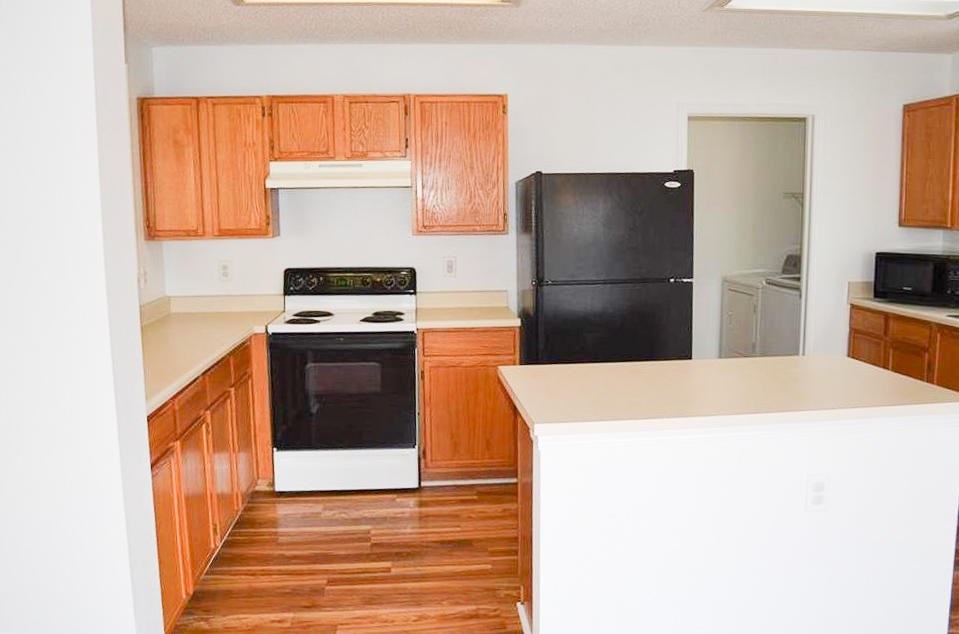
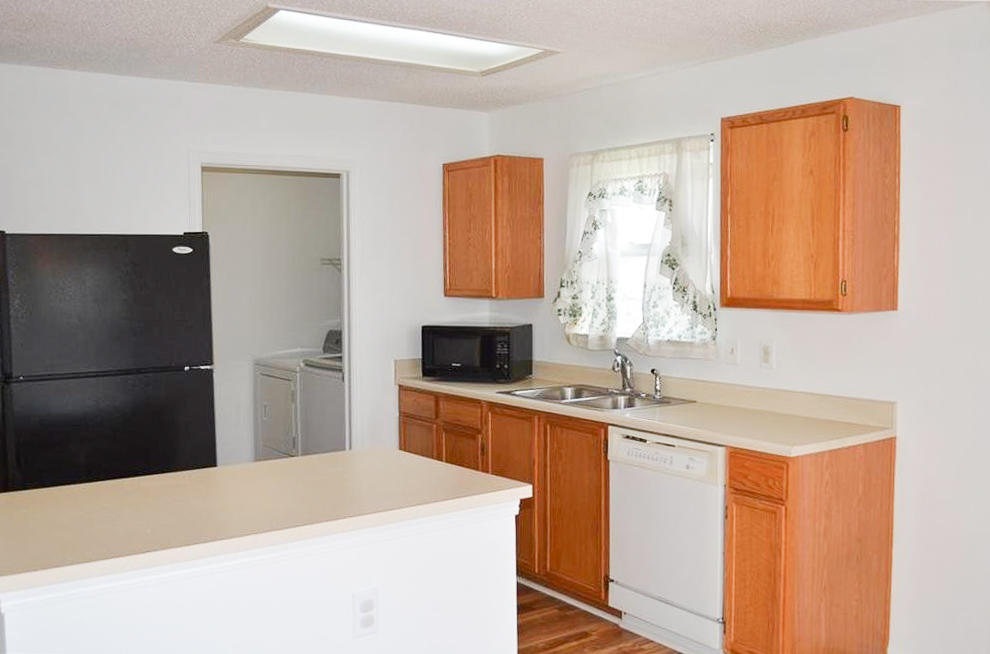
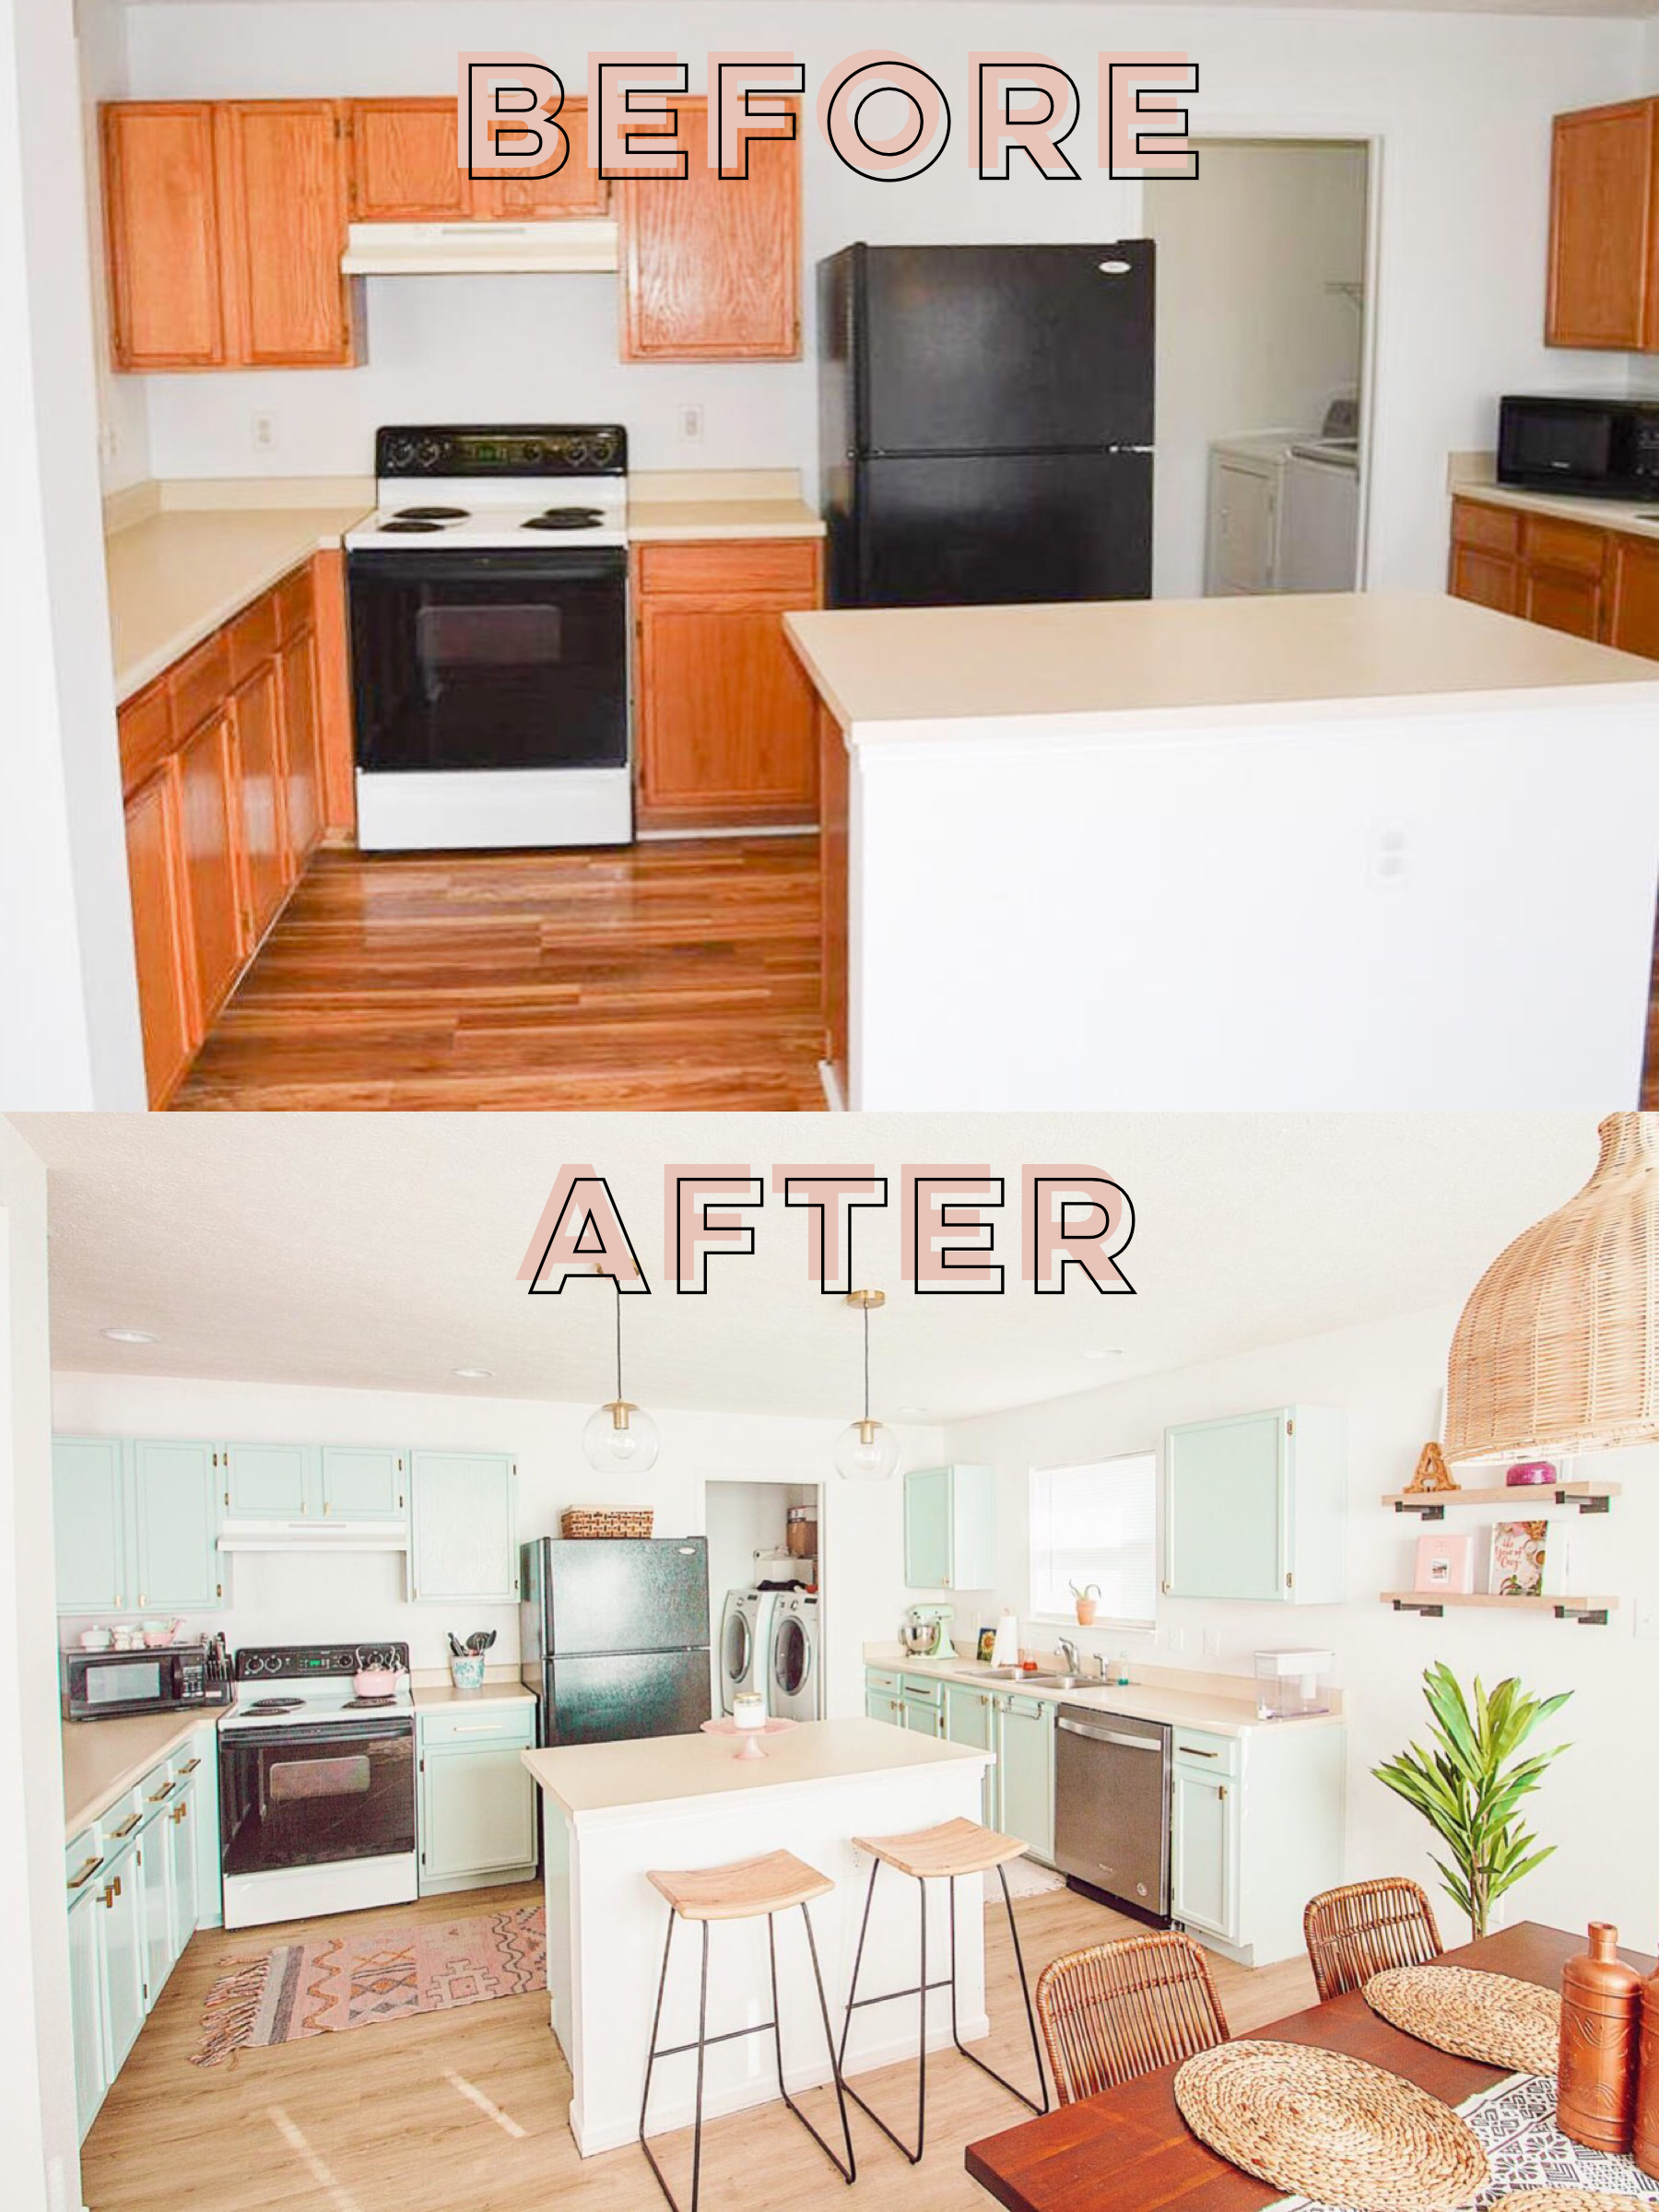
BEFORE

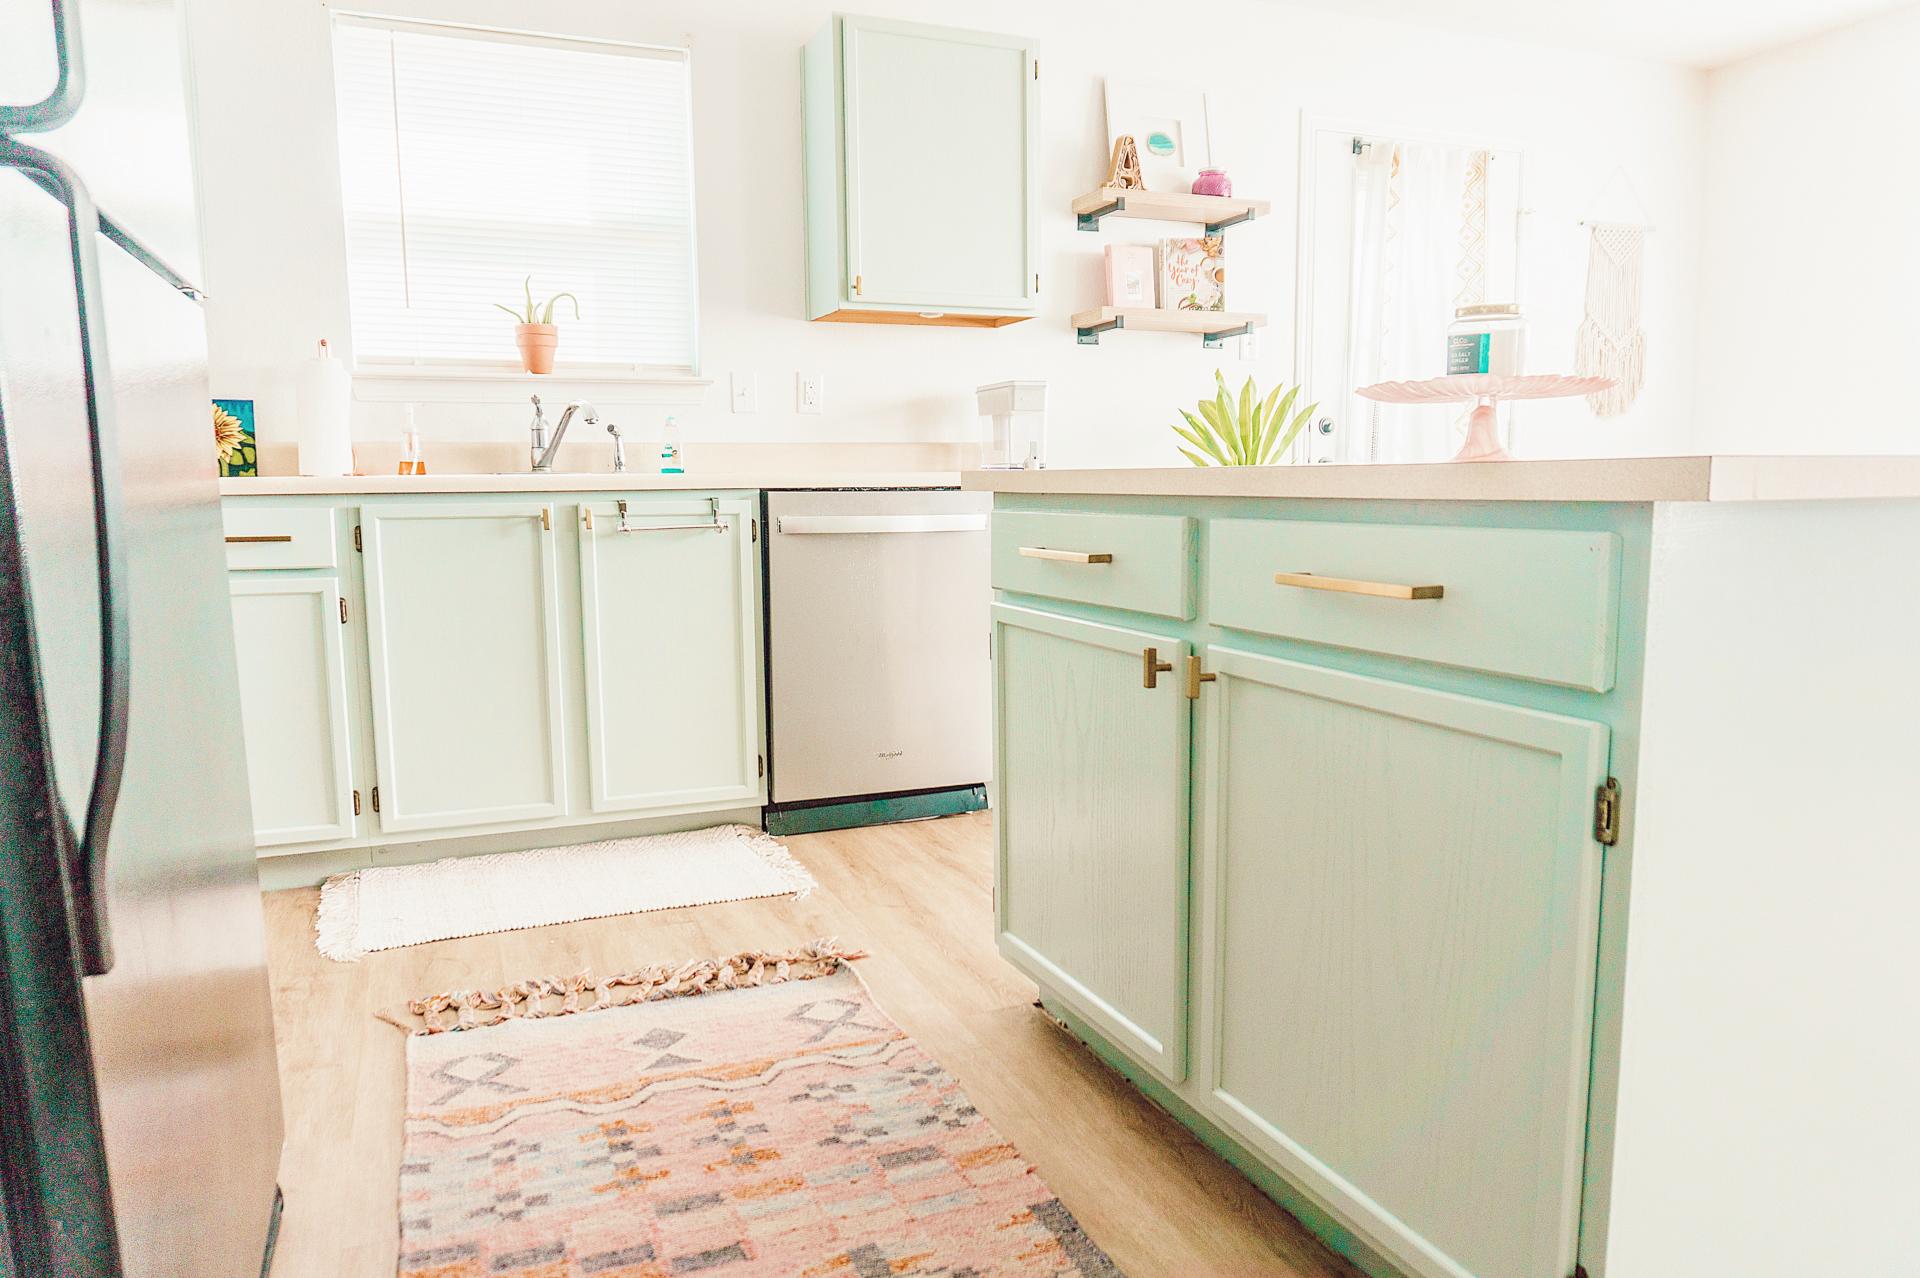
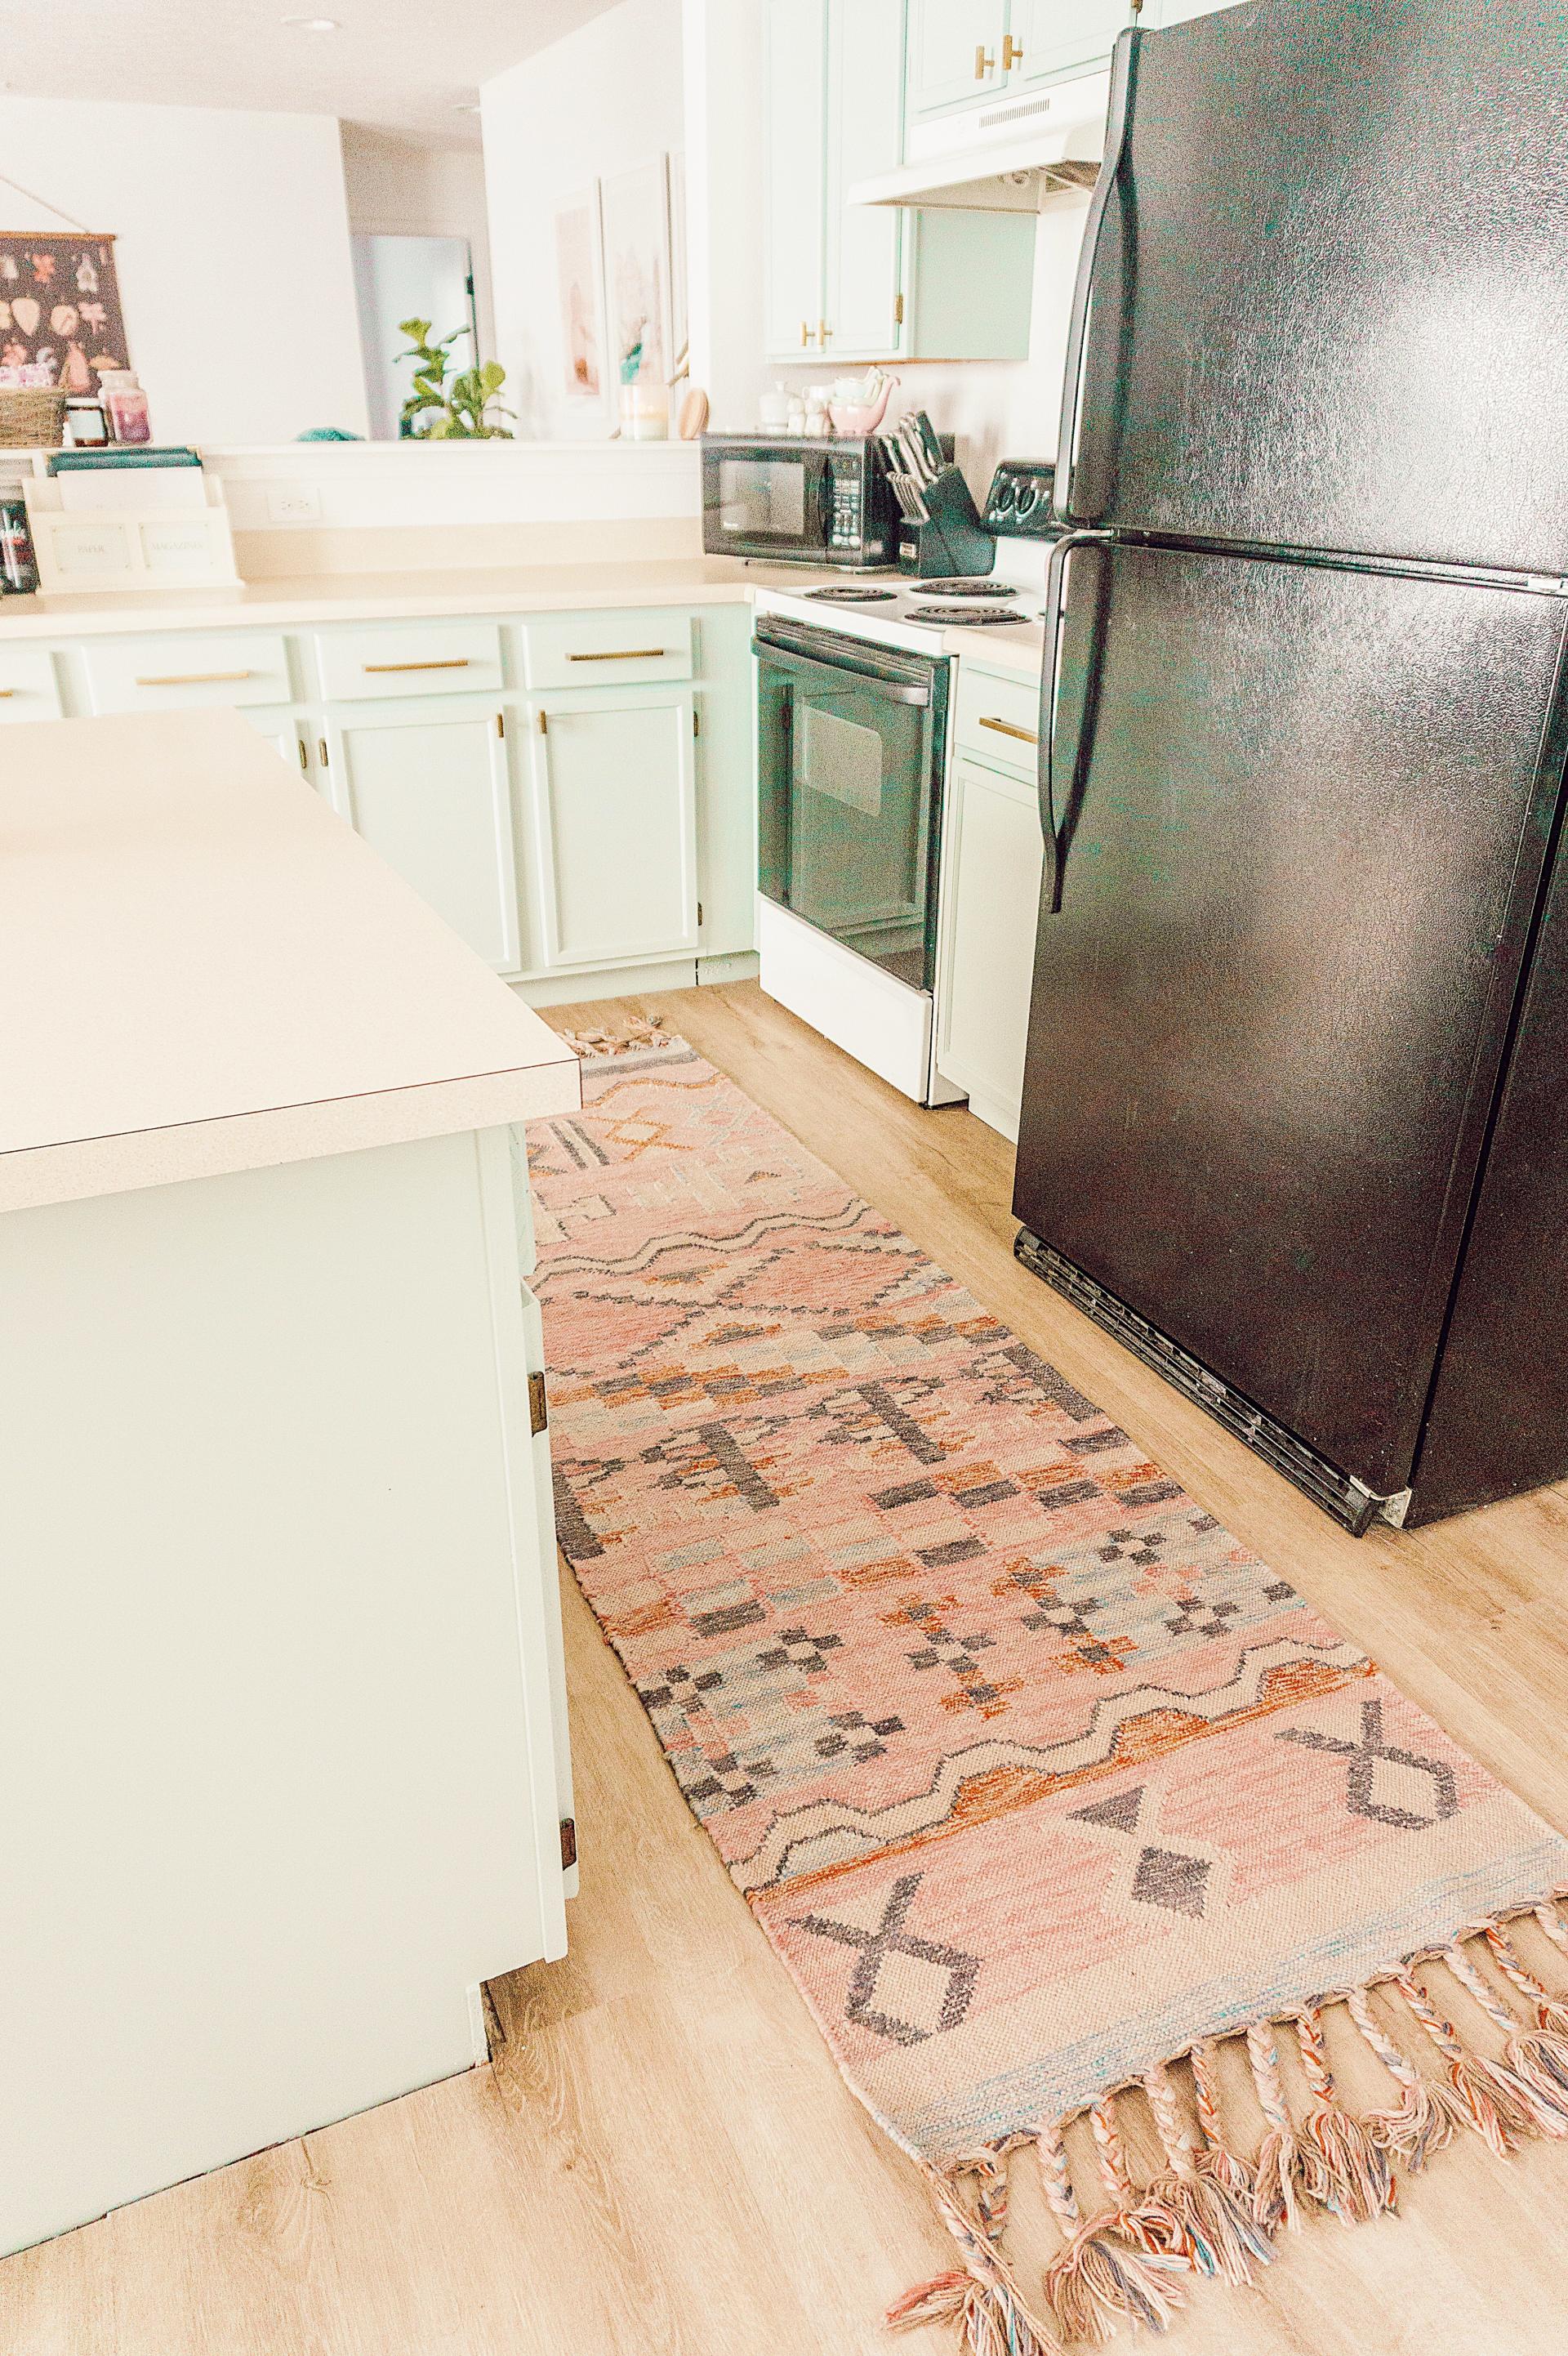
AFTER
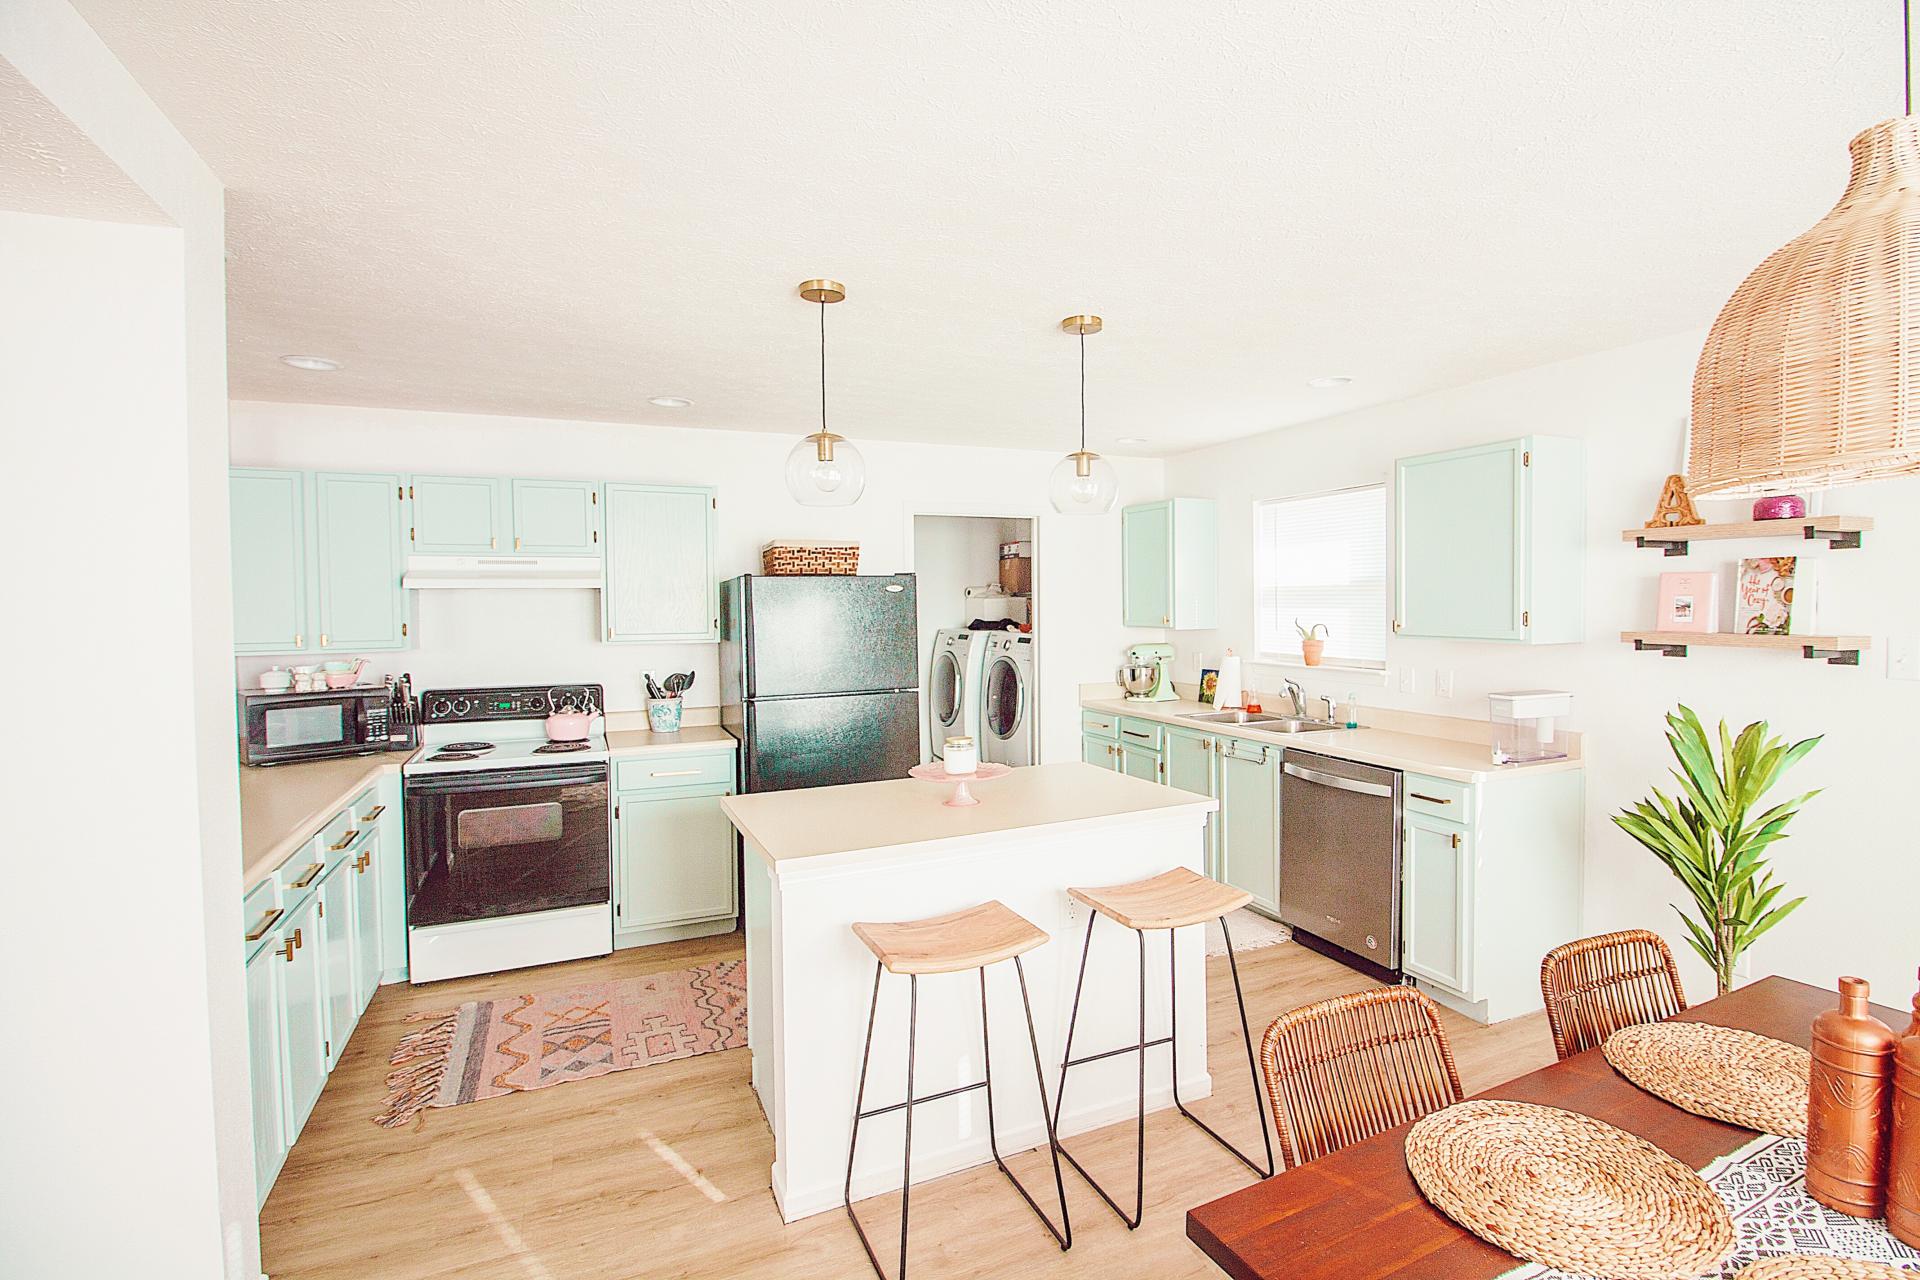
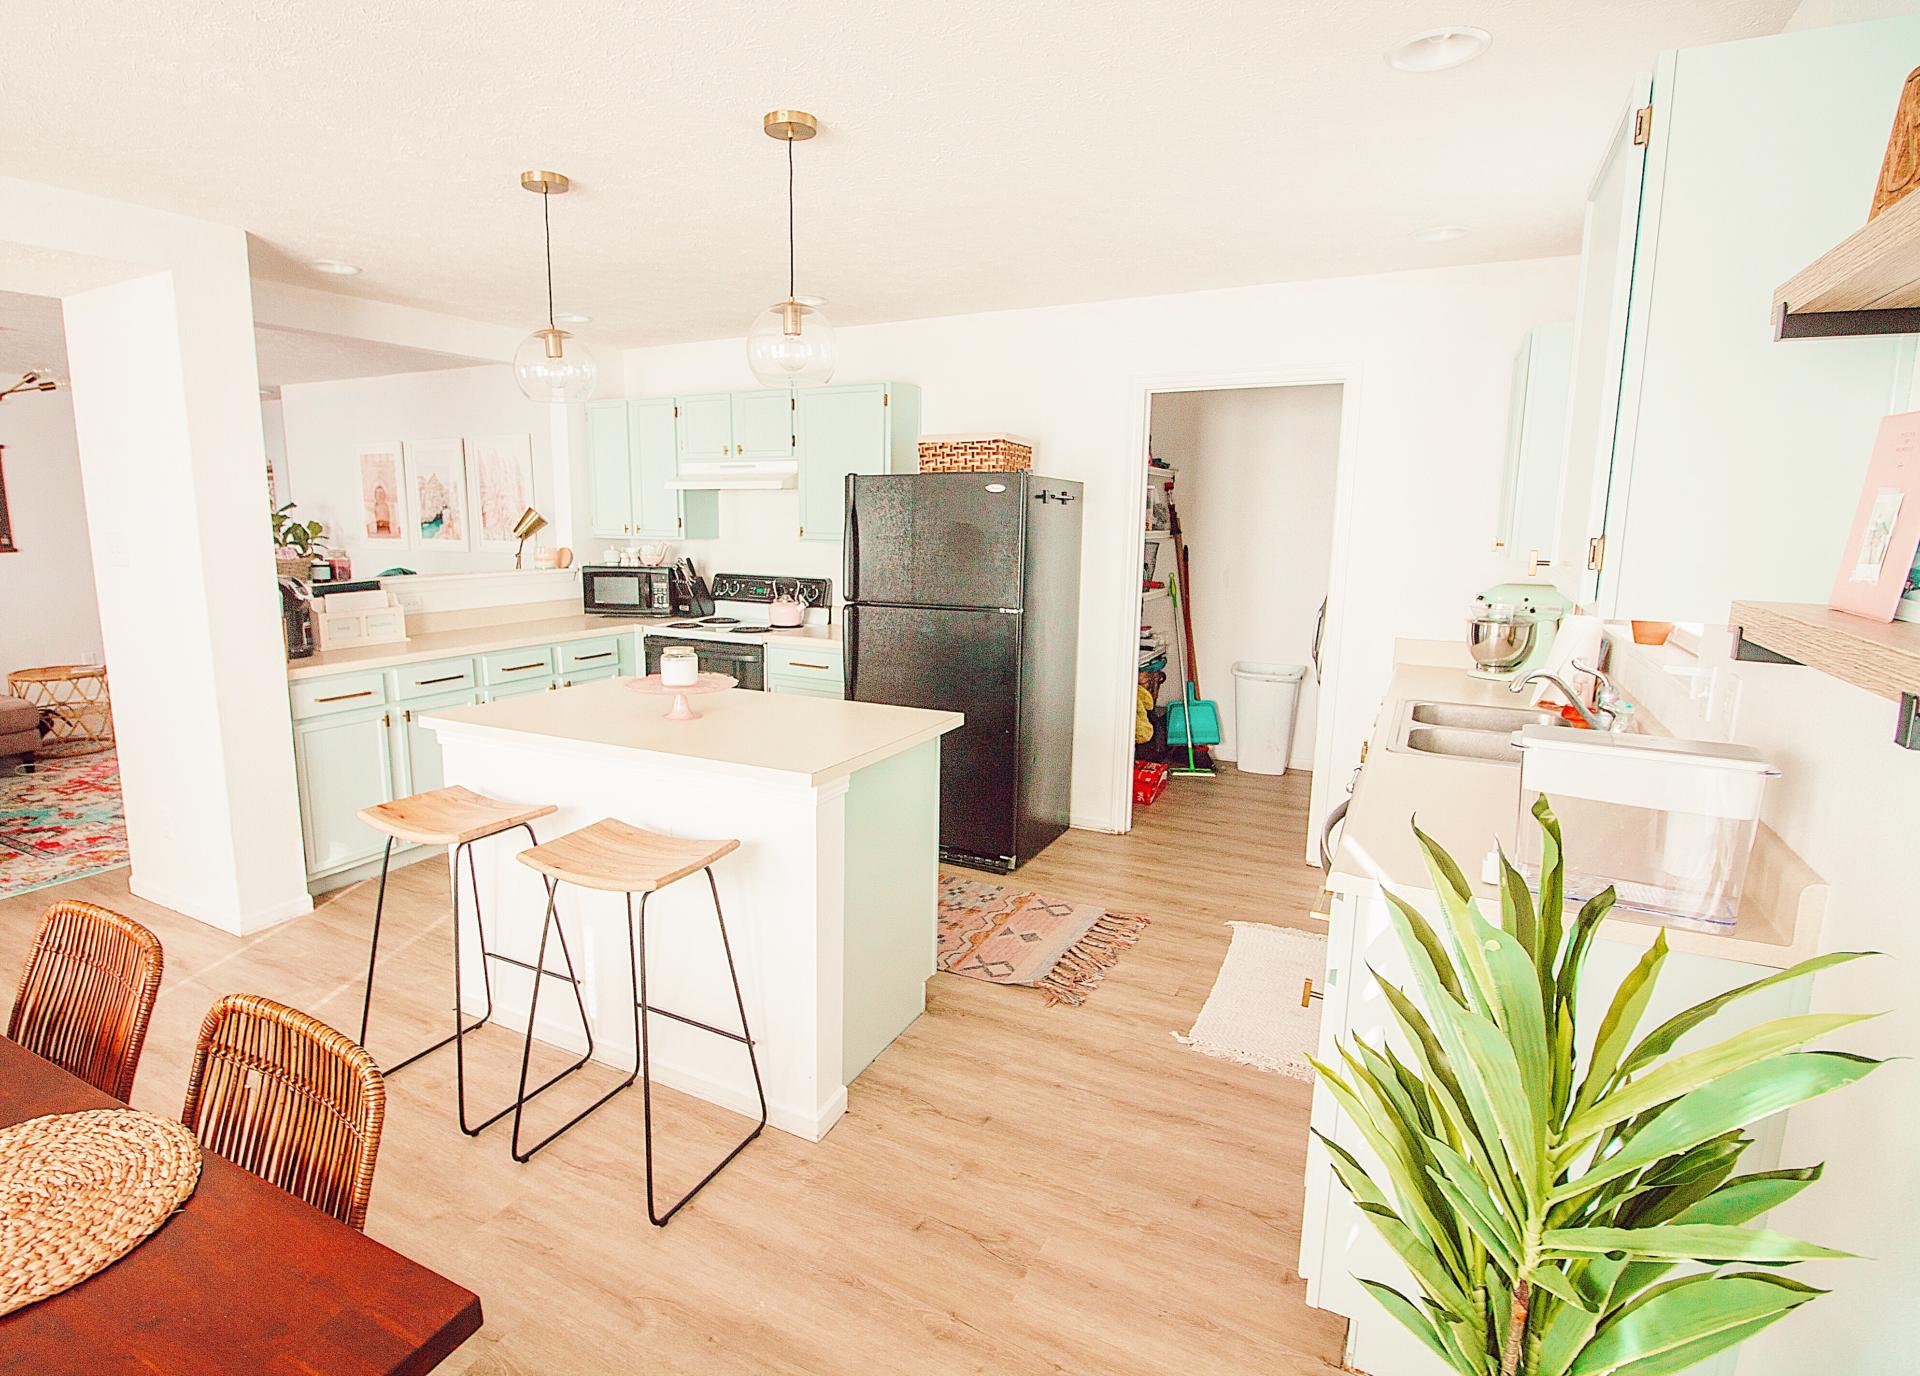
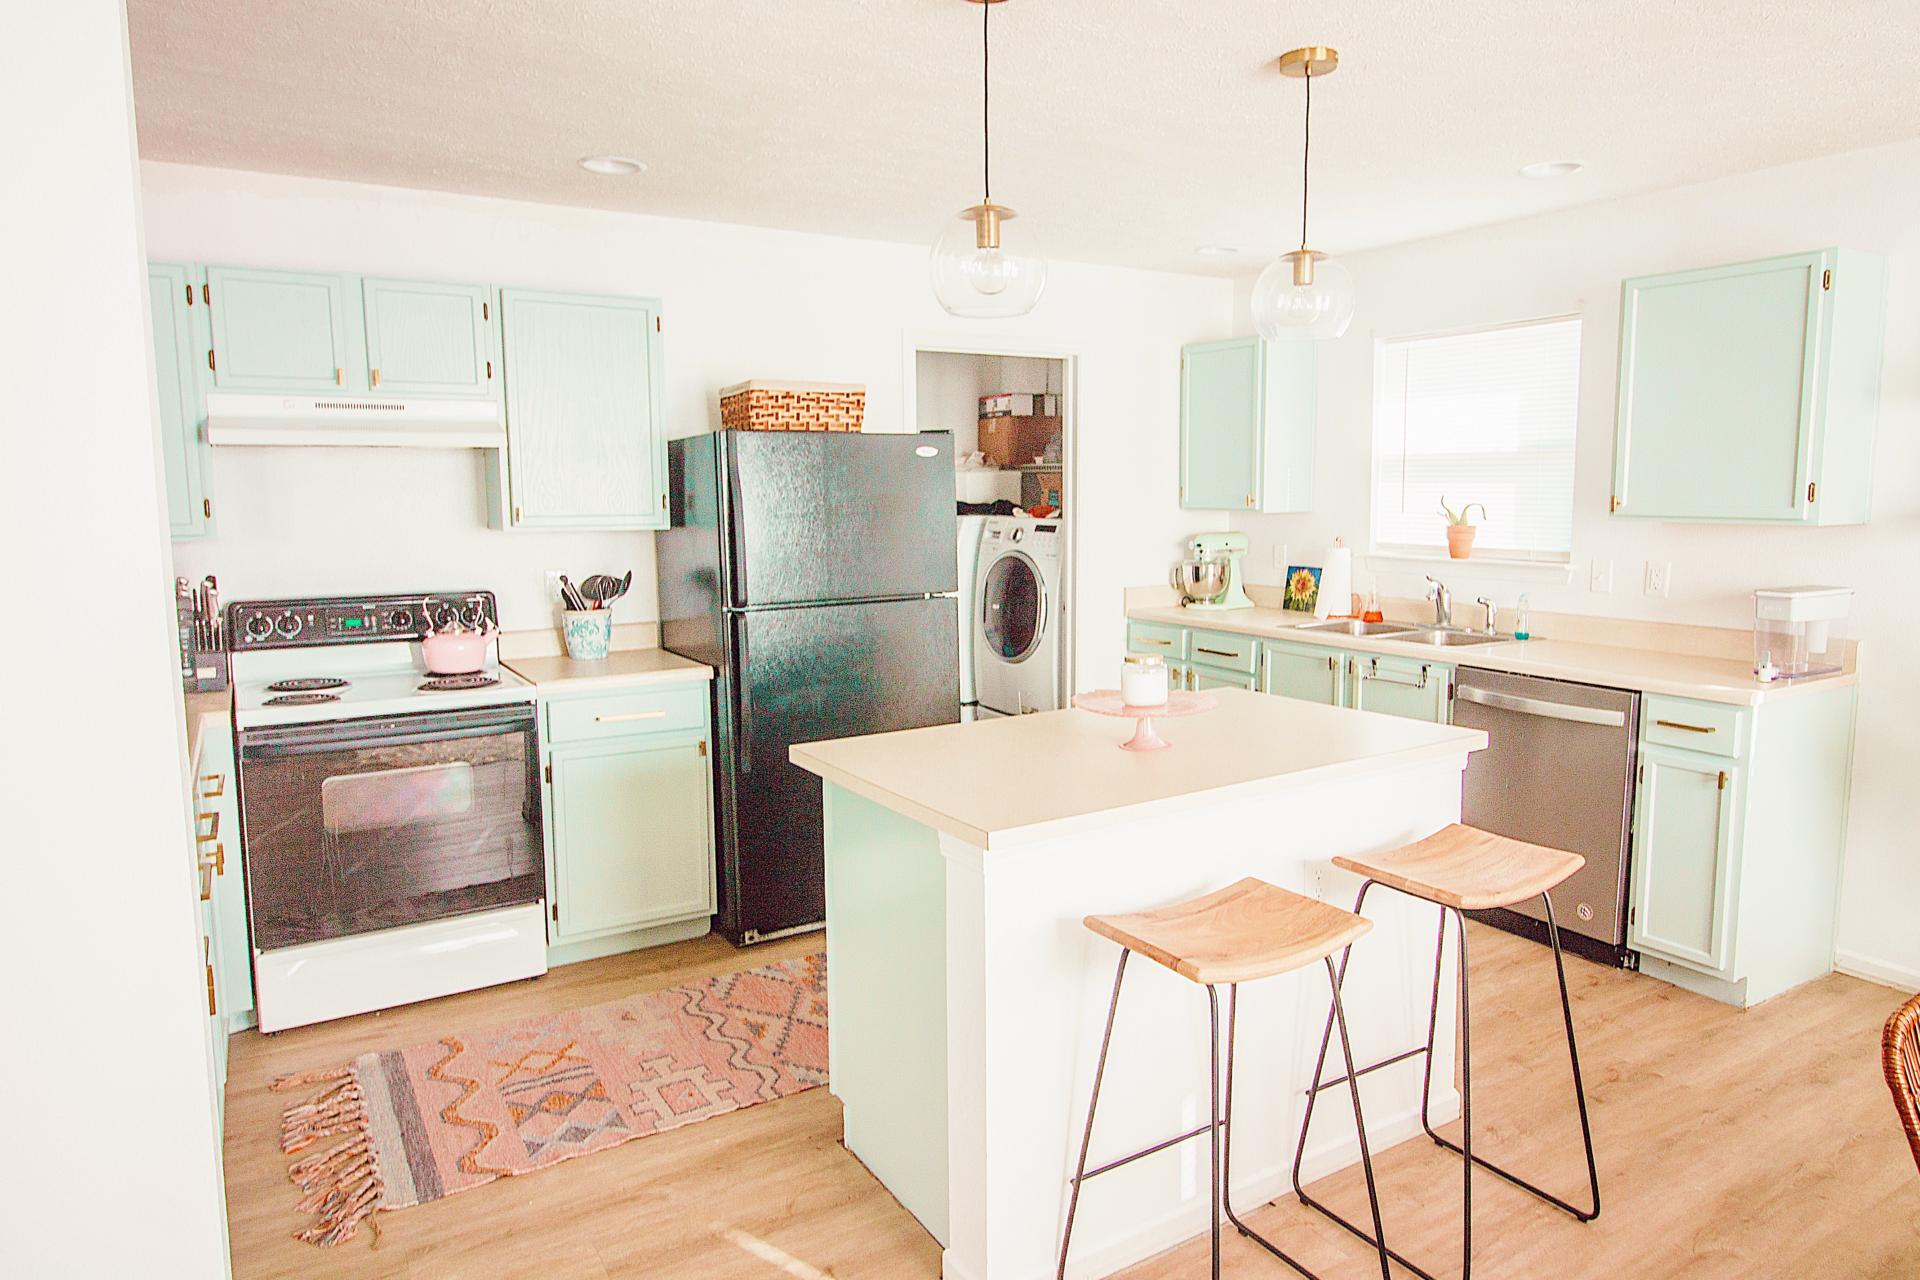
(ignore our laundry room/pantry with random boxes and cleaning supplies in the back — it’s a work in progress 😜)
New space includes the following updates:
- New flooring (Gray Blonde Rigid Core Luxury Vinyl Plank from Floor & Decor)
- New dishwasher (Whirlpool from Home Depot)
- Refinished ceilings
- Removed existing lighting, added can lights and pendants (2 antique brass mini-pendants from Home Depot)
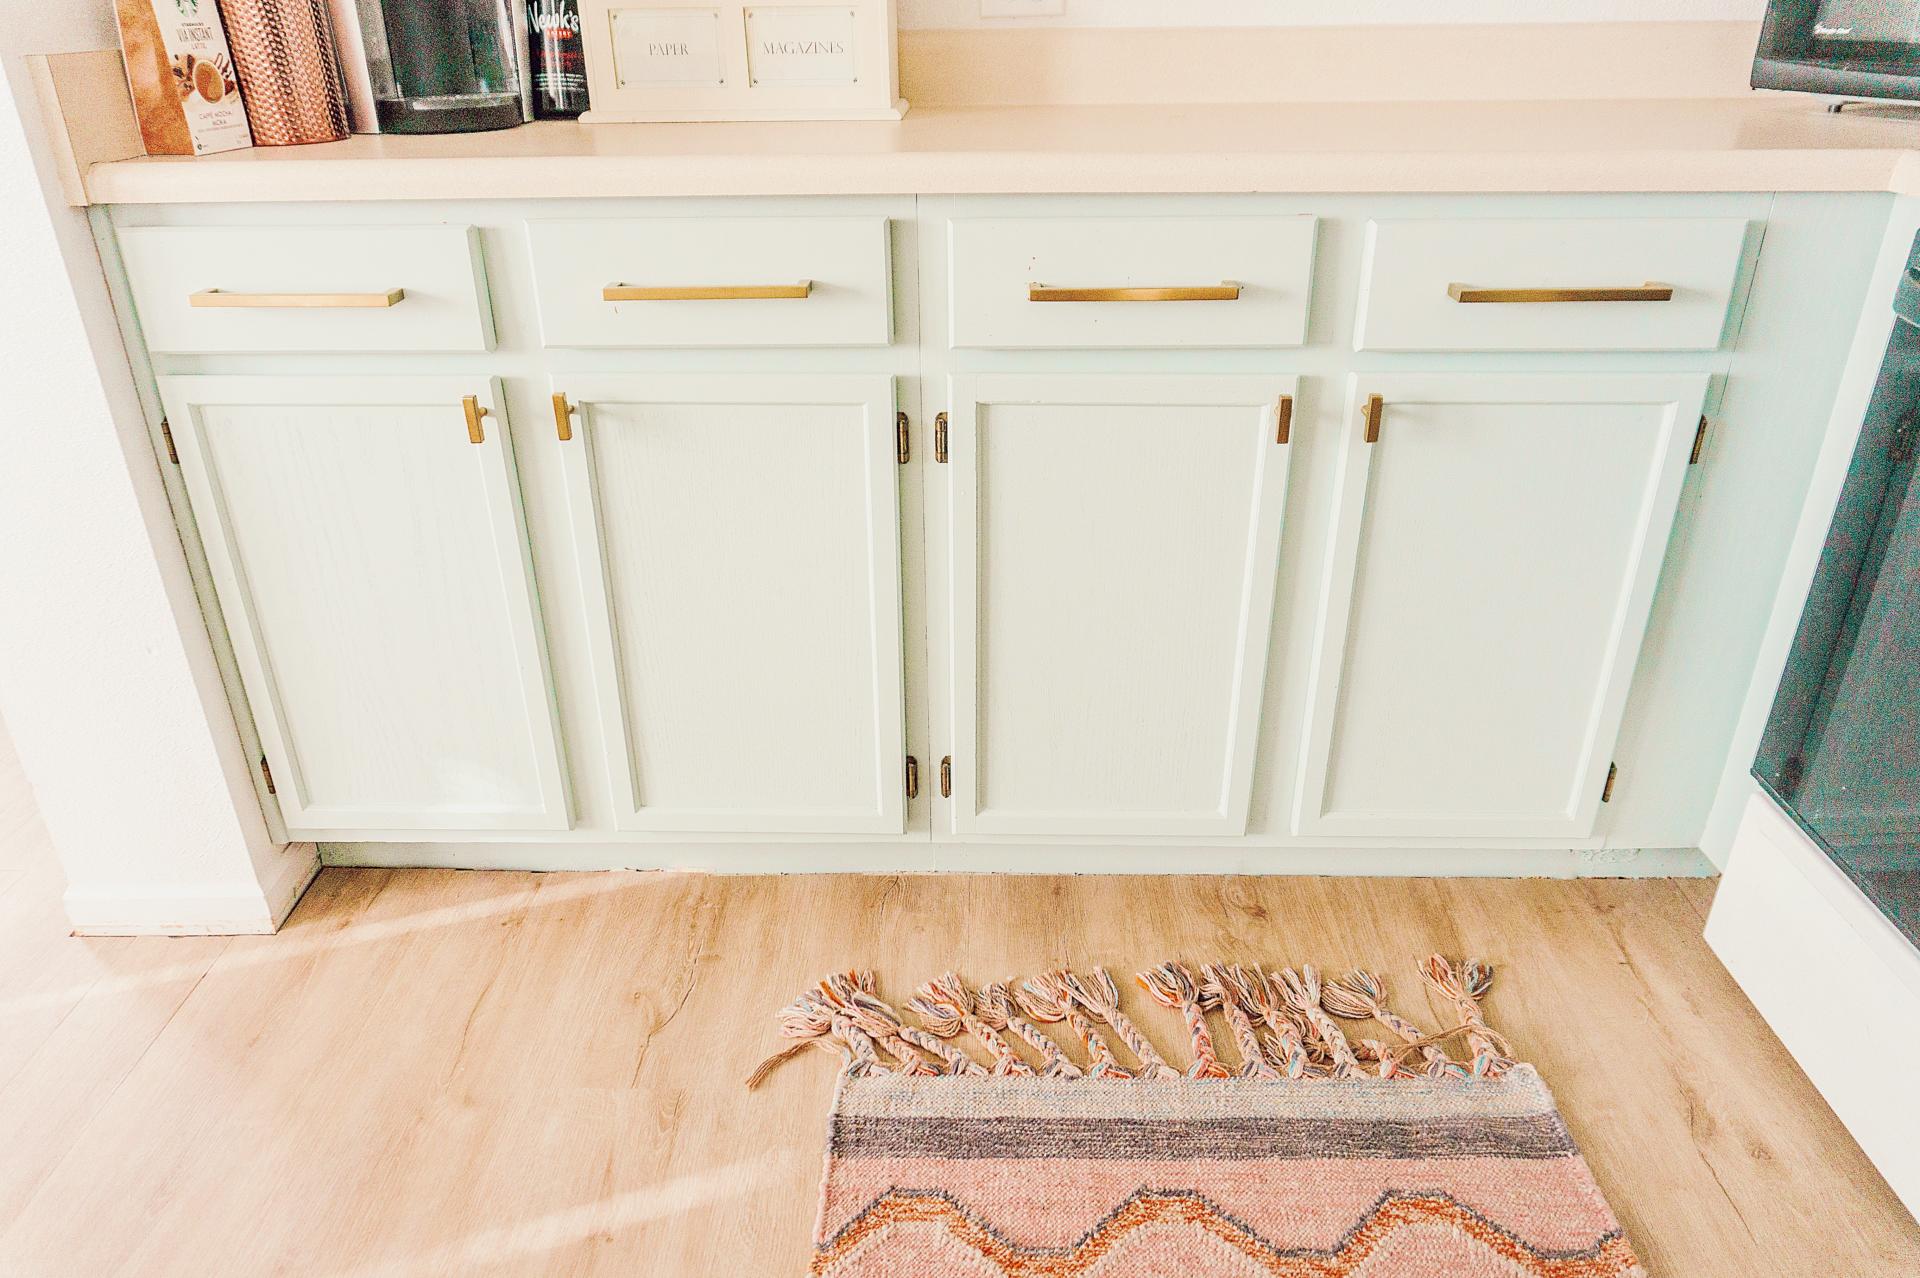
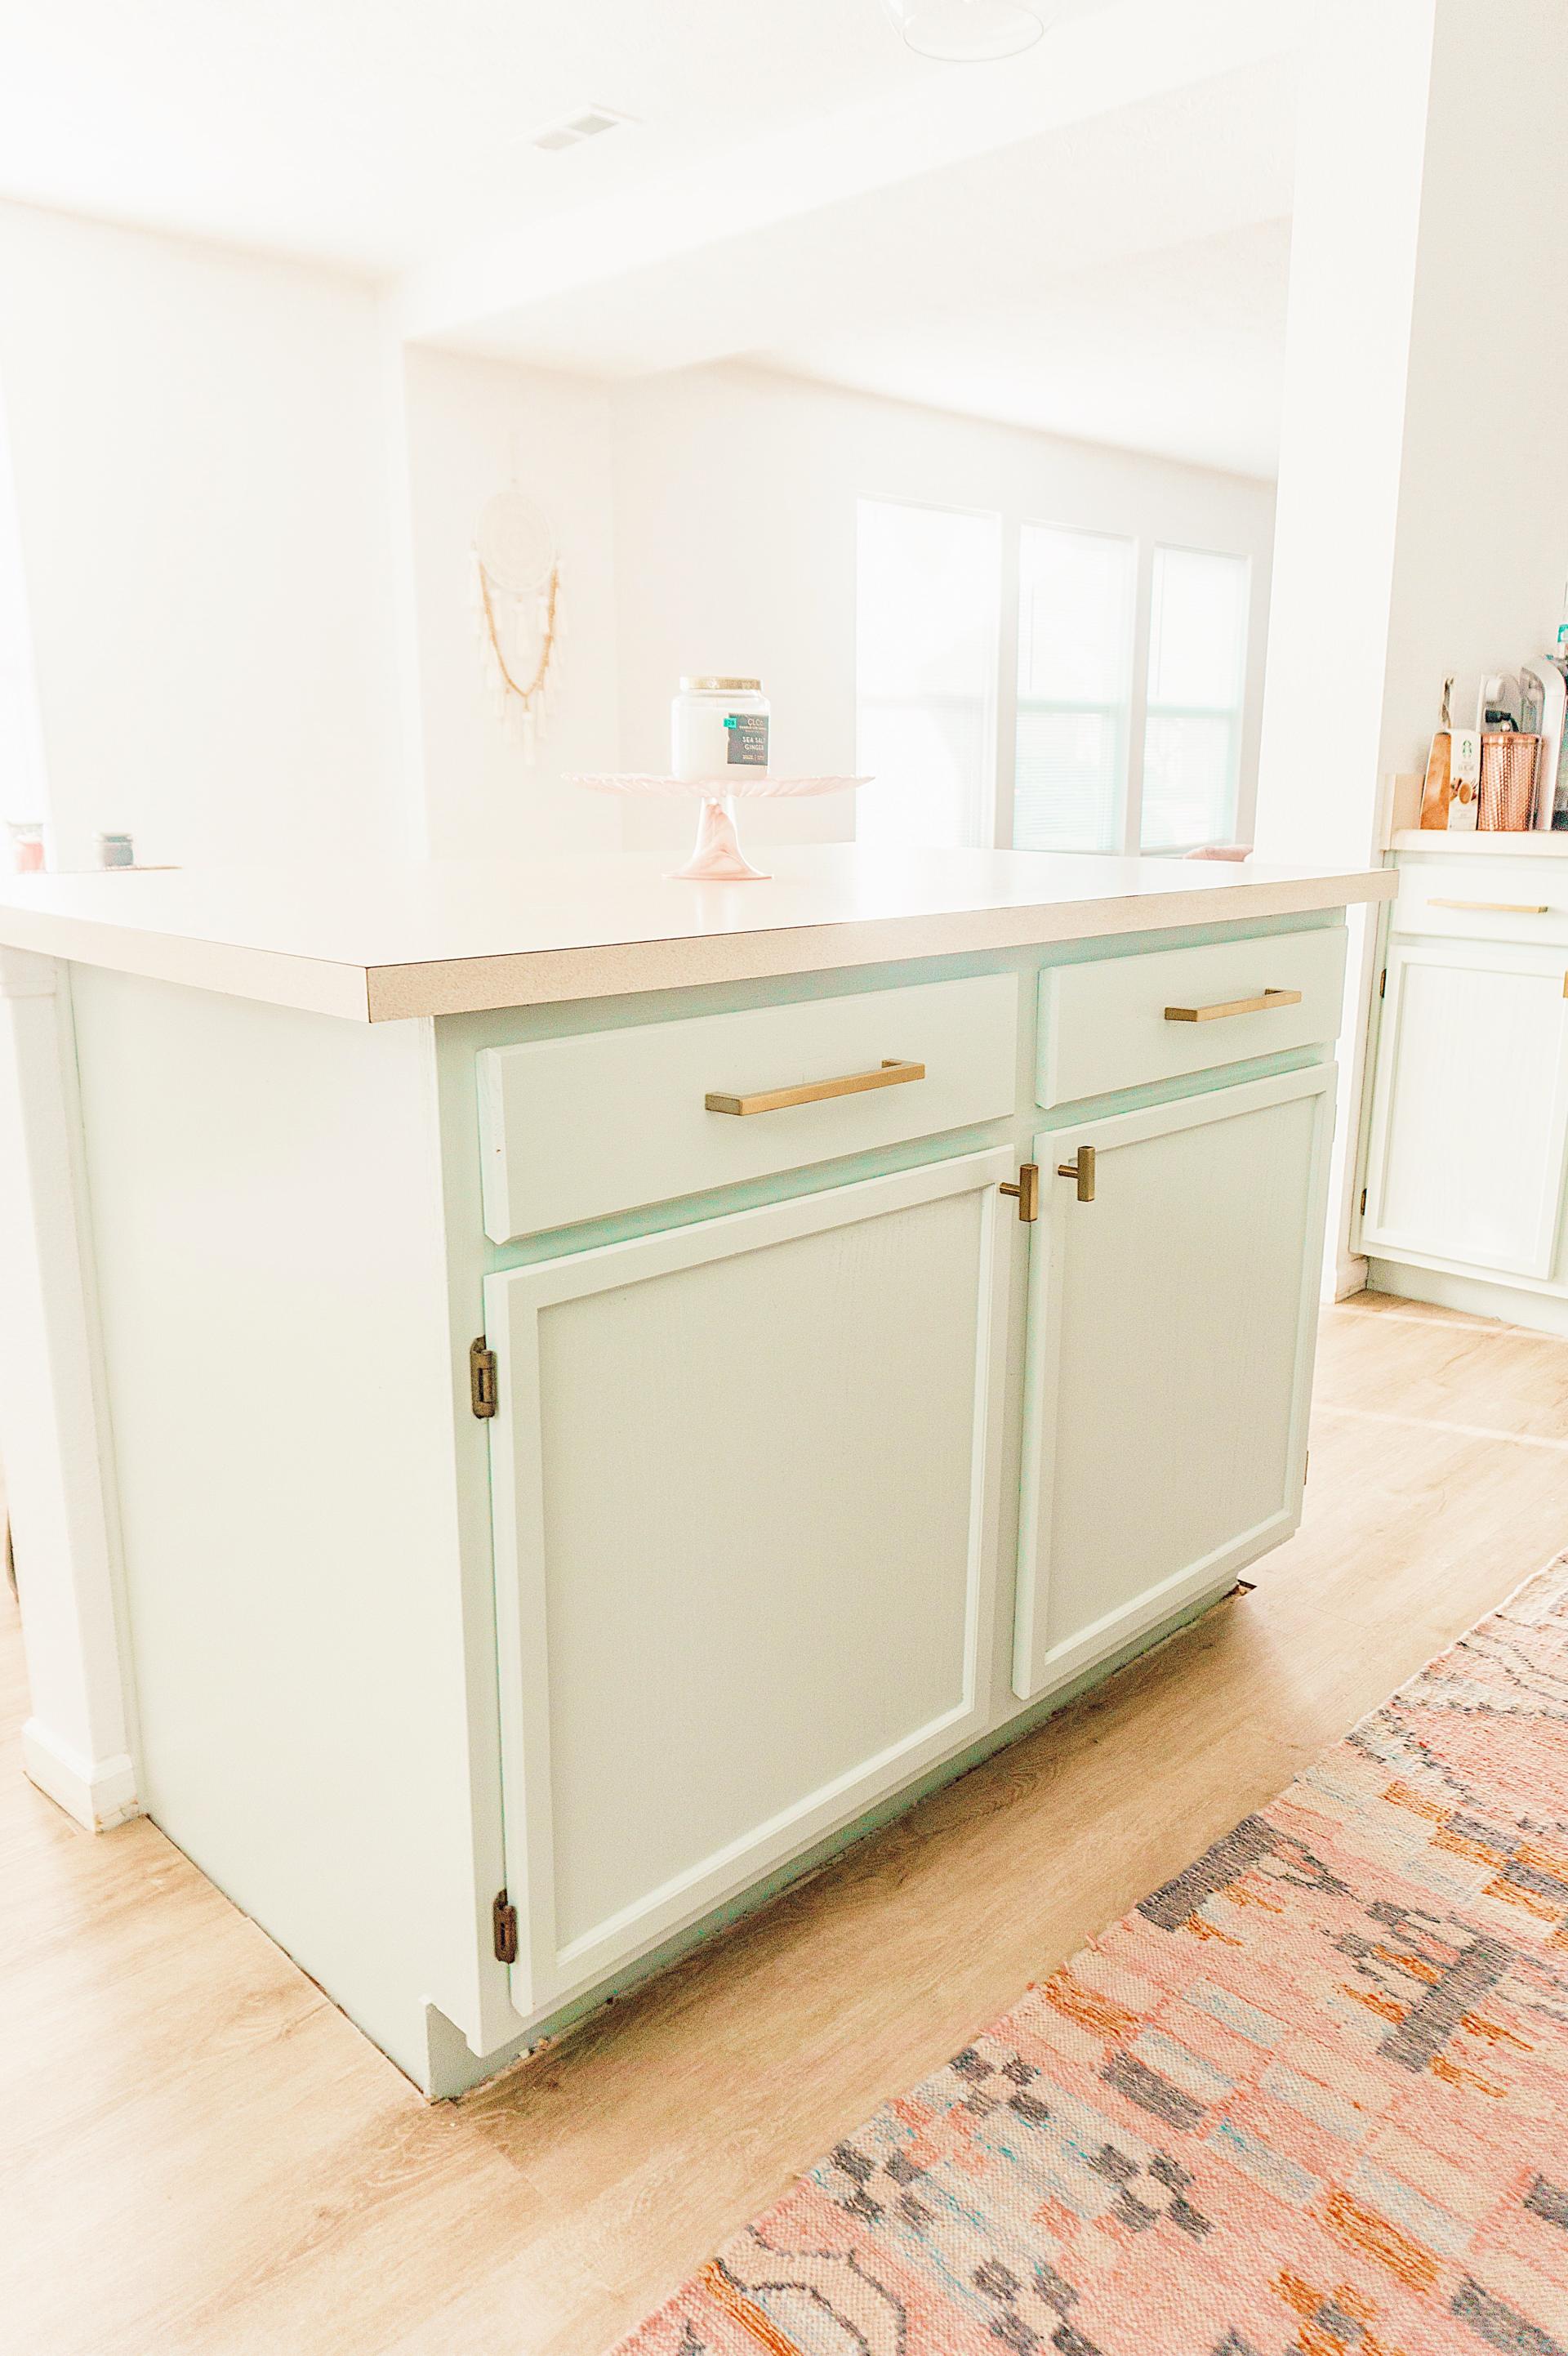
- Painted cabinets and kick plates
CABINET PAINT
*Please note I am not a professional and this was my first time ever painting cabinets. I do encourage you to do your research and maybe ask a friend or family member who has done it before to help you get started!
This is the big topic you all have had the most questions on since so many of you are interested in doing the same to your kitchens. To start this off, I highly recommend painting if you’re at all interested. It completely transformed our kitchen, brightened up the entire space so much and contributes to our home’s aesthetic beautifully. It took me about a week to do the whole thing. Now, let’s get into the step-by-step process.
STEP 1: TSP
You can buy TSP in powder or spray form, but this product essentially removes any existing finishes, helping the paint adhere better. I highly advise taking your time when doing this and wash them thoroughly. This isn’t a step you want to rush or skip, and how well of a job you do with have a strong impact on your end result.
STEP 2: FILL CRACKS & GAPS
You’ll want to get some type of wood filler to fill any cracks and gaps in your cabinets, specifically around framing indentions on your the doors. I applied it with my fingers with latex gloves on, smoothing it around all the edges until I couldn’t see any open spots anymore. This takes some time, but it makes the end result so much better!
STEP 3: PAINT, PAINT, PAINT
We got a gallon of cabinet paint in our chosen shade mixed at Lowe’s, which was more than plenty & we still have a ton left. I painted ours in our dining room with plastic wrap laid down to protect our floors. I removed one section of cabinets and doors at a time and sat them on various boxes and buckets so I could easily paint the edges and sides.
I began by using an angled handheld brush for edging around the walls, countertop and the inner edges of the indentions in the cabinets. Everything else was painted with a roller. I did two coats on everything (including both sides of the cabinets doors and drawers) and I let each layer dry overnight, which I recommend doing as well. Make sure all your layers are even and not clumpy/bubbly, and if you end up seeing thick spots as you go, be sure to smooth them out before they have a chance to dry.
Here’s the paint and types of brushes I used:
- Sherwin-Williams Silvermist
- 4-in Cabinet and Door Foam Mini Paint Roller
- Glide Nylon/Polyester Blend Angle 2-in Paint Brush
STEP 4: REHANG
I suggest using a small handheld drill because it’s much easier with the tight spaces and weird angles, especially if you already have stuff in your cabinets and drawers. We own a larger drill too, but we found the small one to be so much easier to use, plus you don’t need to much power anyway. This is the most satisfying part!
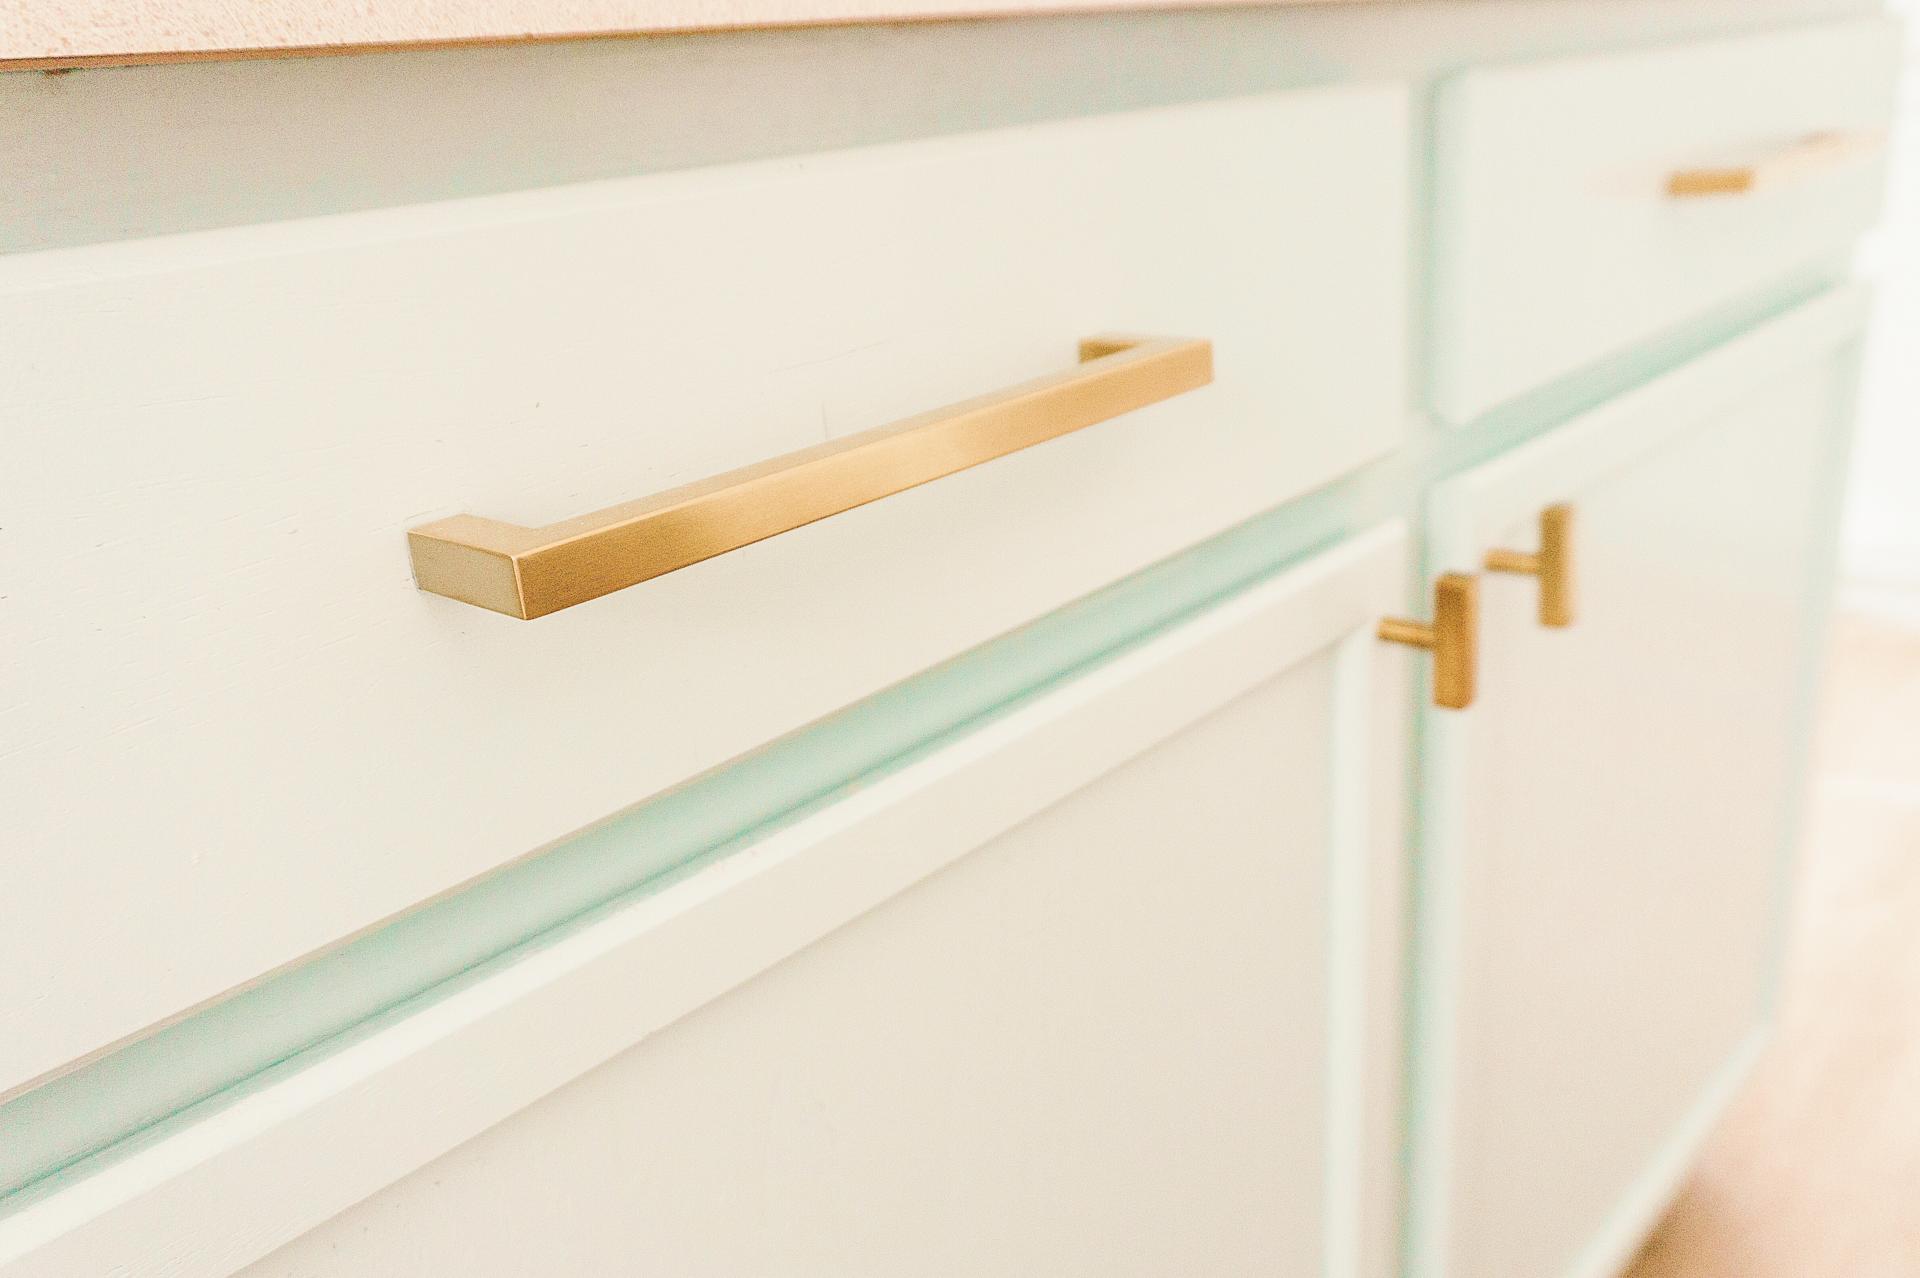
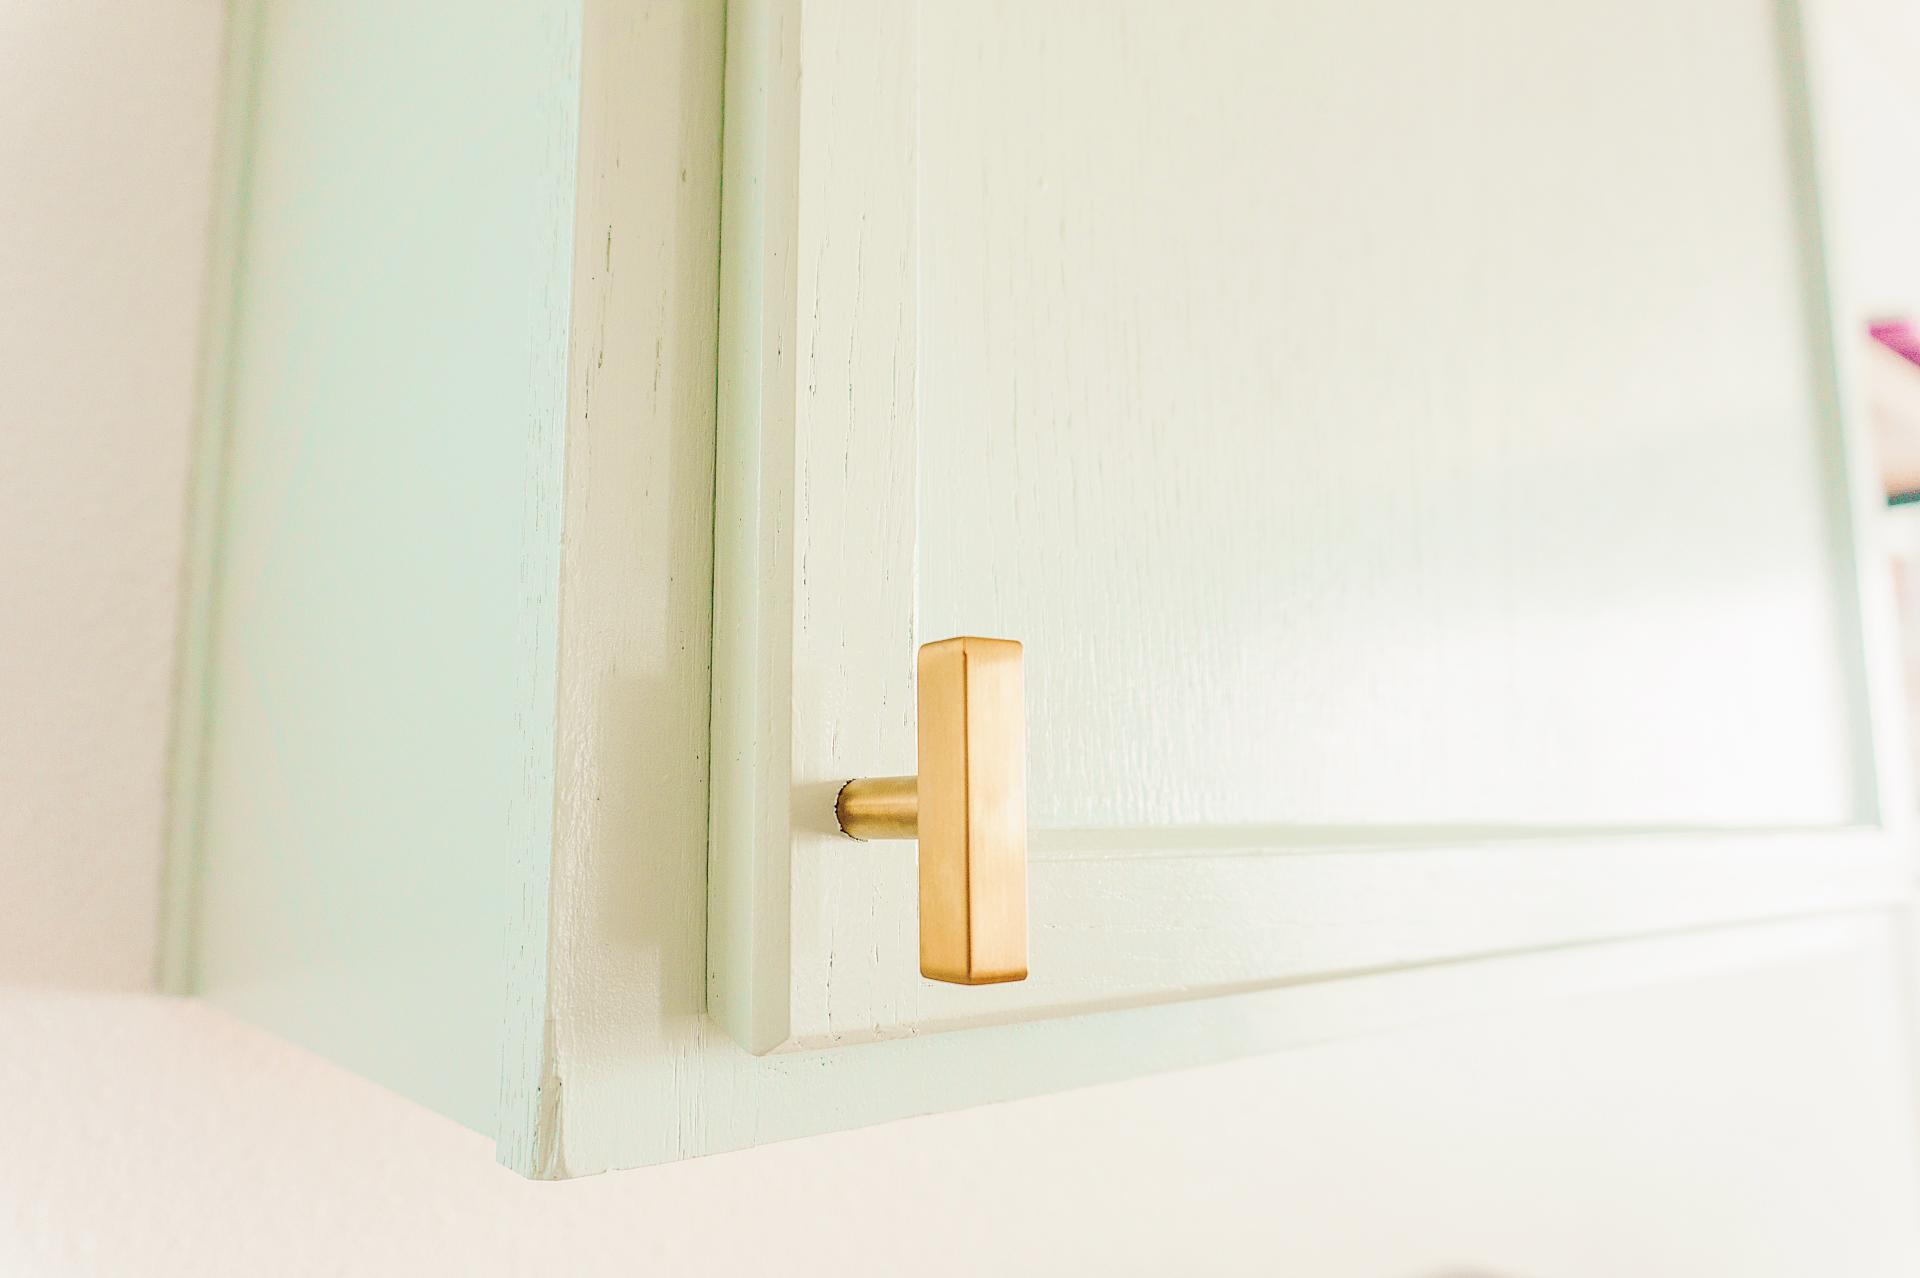
CABINET HARDWARE
I knew I wanted brass hardware from the start, but selecting the style of knobs/pulls I wanted was WAY more difficult than I anticipated. There are so many styles out there and different combinations you can do that it’s overwhelming. I kept putting off buying them because I just couldn’t decide, but my mom stayed the night at our place a few weeks ago and forced me to sit down and finally make a decision (thanks mom, truly 😂).
I’m not going to lie, we had a hard time installing our knobs and we made some rookie mistakes. The cabinet pulls and the small bars of those two sizes we used were super easy because they fit our mounting template, but the large ones were way too big for the additional template we bought (oops). We made it work with a lot of measuring and just hoping for the best. With that being said, make sure you buy a template that’s the width of your widest drawer so you don’t have to struggle as much as we did. I suggest watching a YouTube video on how to do it so you can get a basic understanding of the process.
Here’s what we used:
- Mounting template — make sure you get one large enough for the knobs/pulls you plan to get
- goldenwarm Brushed Brass Drawer Pulls (one 5 inch, the rest are 7.5-8 inch)
- goldenwarm LS1212GD Brushed Brass Square T-bar Cabinet Knobs
- Level to check if they’re even
- Pencil for marking holes
WHAT’S LEFT
We’re not planning on doing any other big changes to our kitchen soon, but we do have a few things we plan to add in the future:
- Add quarter round trim
- Replace kitchen island countertop with butcher block
- Eventually replace the fridge, stove and remaining countertops
That about sums it up! If you have any questions, please don’t hesitate to reach out. If you end up painting your own cabinets after reading this post, please tag me in your images on social media — I’d love to see it! As always, thanks so much for being here and supporting me and my blog. I’m so happy that I can share this process with you. Have a great weekend!

I’m OBSESSED with the painted cabinets. Definitely brightens up the space
Thank you sooo much, Kayla! I’m so happy with them and all the work was worth it! 💕
This DIY is amazing! I love the color and details
Thank you, Taylor! 😊
amazing transformation babe!
xo / easilyinspired-blog.com
Thanks so much, Mary! 💗